The Sales tab of the drawer closing
How can I go to this page?
To go to this page, click on the Shop Section at the top of the screen, then choose the Data Module and click on Drawer Closing. Finally, open the Sales tab.
Introduction to the page
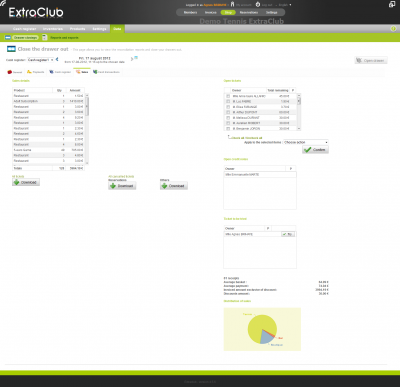
On left part of this screen, you will find a table entitled Sales details. It shows you all the sales that were made during this time period.
Below this table, you can download all the tickets in .pdf by clicking on the corresponding button. You can also download the tickets of cancelled reservations as well as other types of cancelled tickets (sales at the pro-shop, restaurant…).
On the right, the “Open tickets” table shows the list of tickets that are still open and that you need to close to process the drawer closing.
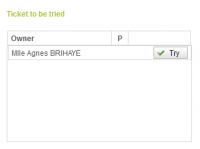
If there are issues with some tickets, they will appear under “Tickets to be tried”.
Finally, below these tables, you can find a few statistics:
- average cart
- average payment
- invoiced amount exclusive of discount
- discounts amount
Then, you will find a graph showing the distribution of sales by accounting family.
Managing open tickets
On the right part of the screen, you can see a table giving you the number of open tickets (that is to say tickets for which no payment was made, or tickets that are partly paid). If there are open tickets for the drawer closing you are about to process, you have two ways to close them. You can use the money the client has on his positive balance or you can add it to the negative balance.
To pay with the positive balance, select the ticket(s) you want to close by checking the box on the left of the name of the owner. Then, under “Apply to the selected items”, choose “Pay using positive balance”. Then, click on “Confirm”.
To add the ticket to the negative balance, repeat the same procedure but choose “Add to negative balance” before confirmation.
Keep in mind that if there is no money on the member's positive balance, the total will be added to the negative balance automatically.
Also, if you select “Add to negative balance” although there is money on the positive balance, the total will be added to the negative balance and the money available on the positive balance will remain the same.
Managing tickets to be tried
Note: a ticket to be tried is a ticket on which you will find reservations. Some of them were paid by the clients but the ticket was edited (for instance, a member was added) before it was completely paid. As a result, the prices for the reservation were recalculated by ExtraClub but the software could not determine who needs to pay which fee. So, it creates a ticket to be tried because you need to intervene and enter the payment(s) to close the ticket.
In the block entitled “Tickets to be tried”, you can click on “Try” to go to the cash register interface and cash a payment for the ticket.

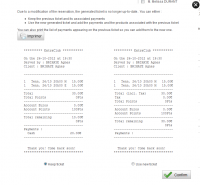
At this point, you can choose to keep the first ticket or to use the new ticket that was generated when a new person was added to the reservation. Click on the ticket you want to keep.
First and foremost if you choose the second option, you can print a receipt of the payments you have already cashed even though it is always possible to find all the information that was entered earlier. Printing remains the best way to keep things simple and to be efficient to save time.
The first ticket will not take into account the new reservation that was added when the first payment was made at the cash register. It will be removed from the ticket but it will remain active on the schedule even though it has not been paid.
The second ticket will take the new reservation into account and the previous ticket will be cancelled. In addition, payments made on the previous ticket will be cancelled too. You will have to re-enter them. It is possible to find the payments that were made previously thanks to the "List of tickets" (you can look for “cancelled” tickets that are “partly paid”). The new ticket containing all the reservations is a “reservation” ticket and its status is “open”.
To cash all payments for the ticket, you can go to the cash register interface. Select the ticket in the list of open tickets and click on “Payment”.
At this point, you need to enter a payment as you would do with any other ticket, whether it is a single or multiple payment.

